Does your toilet run constantly? Is your toilet tank slow to refill?
The first place to check is the flapper, the toilet part that wears out most often. Next comes the toilet fill valve.
If you’re lucky, it may require an adjustment. Otherwise, it will have to be replaced.
Toilet fill valves are cheap; professional plumbers are not.
Fortunately, replacing the fill valve is one of the easier plumbing repairs to perform DIY, saving you a ton of money. This blog will walk you through the steps.
What’s a Toilet Fill Valve?
A fill valve is a simple mechanism controlling water flow into the toilet tank. When you flush, the fill valve opens to let fresh water into the tank, preparing it for the next flush cycle. The fill valve shuts off once the tank reaches the appropriate water level.
A properly functioning fill valve ensures efficient flushing, prevents water waste, and helps maintain a consistent water level in the tank. A faulty fill valve can lead to incomplete flushes, running water, or even water damage from leaks.
Signs of a Defective Fill Valve
- Continuous running water: The fill valve may not be shutting off.
- Inconsistent or low water level in the tank: The fill valve may not open fully.
- Toilet refilling slowly: A clogged or worn-out fill valve can restrict water flow into the tank.
- Hissing sounds from the toilet tank: This could be air escaping from a cracking or gasket in the fill valve.
- Water leaks around the toilet base: Look for a worn-out or improperly installed fill valve.
Common Problems & Solutions
- Water hammer: Adjust the fill valve to reduce water pressure.
- Noisy fill valve: Clean or replace the fill valve diaphragm.
- Clogged fill valve: Remove any debris or sediment blocking the valve’s inlet.
- Fill valve doesn’t shut off: Adjust or replace the float. If the float is too high, water will continue to run. Lowering the float typically resolves this problem.
- Leaking fill valve: Tighten the locknut at the base of the fill valve.
If these simple adjustments don’t fix the fill valve, here’s how to replace it:
Replacing the Toilet Fill Valve
Tools & Materials
- New toilet fill valve
- Adjustable pliers or wrench
- Bucket or towels for water cleanup
- Teflon tape (optional, for securing connections)
- Sponge or rags (for drying out the tank)
- Old toothbrush or small brush (for cleaning the inlet before installation)
Step 1: Shut off the Water Supply
- Locate the water shut-off valve behind or near your toilet and turn it clockwise.
- If you don’t have a shut-off valve, turn off the water supply to your entire house.
- Let everyone in the house know not to use any water while you work on the toilet.
Step 2: Empty & Clean the Tank
- Flush the toilet to drain as much water as possible from the tank.
- Remove any remaining water with a sponge or rag.
- Use an old toothbrush or small brush to clean around the inlet where the new fill valve will be installed.
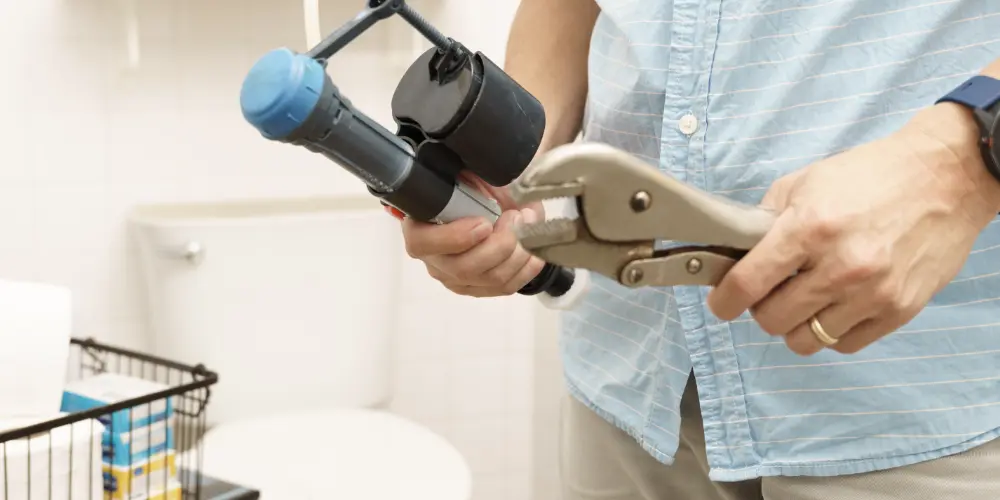
Step 3: Remove the Old Fill Valve
- Disconnect the water supply line from the fill valve under the tank. You may need adjustable pliers or a wrench for this step.
- Be prepared for some water spillage, so have a bucket or towels handy.
- Loosen and remove the locknut that secures the fill valve to the bottom of the tank.
- Lift out the old valve.
Step 4: Install the New Fill Valve
- Take your new fill valve and adjust its height according to the manufacturer’s instructions.
- Insert the base of the fill valve into the hole in the bottom of the tank.
- Secure it underneath the tank with the provided locknut, tightening it by hand.
- Avoid over-tightening, which can crack the porcelain.
- Reconnect the water supply line using Teflon tape on the threads if recommended by the fill valve manufacturer.
Step 5: Adjust the Water Level
- Turn the water supply back on. Allow the tank to fill.
- Most fill valves have a float that controls the water level; adjust this float according to the manufacturer’s instructions or your previous water level.
- The correct water level is typically about an inch below the top of the overflow tube.
Step 6: Test & Check for Leaks
- Check for any leaks around the base of the fill valve and the connection to the water supply line.
- Tighten any connections if necessary, but be careful not to overtighten.
Step 7: Cleanup & Final Inspection
- Wipe down the toilet and surrounding area.
- Remove any tools, towels, and other materials you used.
- Do a final flush to ensure the toilet operates as expected and the fill valve shuts off properly when the tank is filled.
There! You just saved a tidy chunk of change with your DIY toilet repair.
Now, go to the kitchen and reward yourself with a sandwich and a favorite beverage. Wash your hands first, please.
Tips for Maintaining a Properly Functioning Fill Valve
- Regularly clean the fill valve and its components to prevent mineral buildup and debris.
- Check the water level in your tank periodically and adjust the fill valve as needed to maintain consistent levels.
- If you notice any issues with your toilet’s flushing or water levels, address them immediately.
- Occasionally inspect the toilet flapper and chain for signs of wear or damage. A deteriorating flapper can lead to water leaks, affecting the fill valve’s performance and increasing water bills.
- Consider installing a dual-flush valve for greater water efficiency. Depending on the waste, these valves allow you to choose between a full and half flush.
FAQs About Toilet Fill Valve Replacement
Q: How often should a fill valve be replaced?
A: It depends on the quality of the valve and your water supply. Generally, it’s recommended to replace every 5-7 years or when you notice issues with flushing.
Q: Can I use a universal fill valve?
A: Yes, as long as it’s adjustable to fit your toilet. However, some toilets may require a specific brand or model.
Q: What should I do if there’s a leak after replacement?
A: First, check all connections and make sure they’re tight. If the leak persists, try adjusting the float or replacing damaged parts on the new fill valve.
Q: Can high water pressure affect my fill valve?
A: High water pressure can cause premature wear and tear to the fill valve and other toilet components. You might need a pressure-reducing valve or adjustment to the fill valve to balance the higher pressure.
Q: Do I need to turn off the water supply to the whole house for valve replacement?
A: Not if you have a local shut-off valve near your toilet. However, if you don’t have one or it doesn’t work, you’ll need to turn off the water supply to the entire house.
Q: Is it normal for the fill valve to make noise?
A: Some noise is normal when the tank fills, but persistent or loud noises can indicate a problem, like a clogged or faulty valve.
Q: What’s the best way to clean a fill valve?
A: Remove the valve cap and flush out the valve with clean water. A mild vinegar solution can help dissolve mineral buildup for more stubborn deposits.
Q: Why does my toilet keep running after replacing the fill valve?
A: This could be due to the water level being set too high, the float not correctly adjusted, or a leak between the tank and bowl. Double-check these areas for proper setup.
Q: How do I know if my fill valve is compatible with my toilet model?
A: Most modern fill valves are designed to be universal. However, it’s best to check the specifications of the fill valve against your toilet model.
