A leaking toilet is a serious plumbing problem. A toilet leaking at the base packs an even bigger punch. That’s because:
- The leaks are easy to miss.
- They can cause significant damage to walls and flooring if not addressed promptly.
- Water can seep into lower levels of a building, creating a damp environment for mold.
The source of the leak may be hard to trace. But the three most common causes of toilet leakage at the base are:
- A faulty wax ring: This seal sits between the toilet and the sewer pipe and can leak if broken, warped, or otherwise damaged.
- A cracked toilet base: Normal wear and tear or an event like an earthquake can break a toilet.
- A leaking supply line: Loose connections or a damaged hose can leak.
Other potential sources of water at the base include:
- Toilet tank condensation mimicking a toilet leak.
- Loose or degraded bolts anchoring the toilet.
Is Your “Toilet Leak” Condensation?
First, let’s rule out condensation.
Condensation is water vapor turning into liquid, usually when warm air comes into contact with a cooler surface. Metal surfaces, glass, and porcelain can be condensation magnets.
Water vapor in the warmer air condenses on these colder surfaces and forms liquid droplets. The process happens faster In humid rooms and conditions because more atmospheric moisture leads to higher condensation rates.
Several factors contribute to condensation at the base of a toilet, including the temperature difference between the toilet and the room, the humidity level, and even how clean your toilet bowl is!
Poor ventilation is a factor. Furthermore, with an older, improperly sealed toilet, condensation can form just above the toilet’s base.
A little condensation? No biggie.
A lot of condensation, to the point where it looks like a leak? That’s something you shouldn’t ignore. It can cause water damage if left unchecked.
How to Prevent Toilet Condensation
- Install a small drip tray to keep the water off your bathroom floor as a temporary solution.
- Adjust your bathroom habits. Keep the door slightly open (the cats will love you for it), or leave the fans on.
- Insulate the toilet tank to prevent the water inside from cooling.
- Check the flapper for damage while letting a constant stream of water into the tank.
- Replace your old toilet with a low-flow toilet that uses less water, reducing the volume of cold tank refills.
- Install an anti-sweat or mixing valve to warm the water before it enters the toilet tank.
But if condensation’s not the problem, we’re back to leaks (and you should check for leaks first and condensation second).
How to Find a Toilet Leak at the Base
Turn off the toilet’s water supply until you can do the repair (or call a plumber). Contaminated water from a toilet poses a health risk. Post a prominent “Do Not Use” sign for the rest of the family.
Dry any standing water before you look for leaks in the supply line, base, and wax seal.
Check the toilet’s supply line
Your water supply line may be compromised if water pools where the tank and base connect.
- Check and secure the connections. If they still leak after tightening, wrap Teflon tape around the threads of the male connector, reconnect, and test again.
- Teflon tape can also seal a damaged hose.
- Finally, you may have to buy and install a new supply line and connectors.
When you flush the toilet, does water seep from the base? If so, the problem lies with the tee bolts, the toilet’s wax seal, or the toilet base itself.
Inspect the bolts anchoring the toilet
Removable plastic caps cover the tee bolts securing a toilet to the sewer pipe.
- Are tee bolts loose? Tighten them.
- Are bolts corroded? Replace them. But you’ll have to detach the toilet from its base.
Check for cracks in the base
Ceramic toilets are tough and durable but can still crack from earthquakes or repeated impacts (like a heavy dropped object).
Abrasive toilet cleaners and harsh chemicals can erode the ceramic (this is why pouring bleach directly into a toilet bowl is a bad idea!). Tiny, barely visible cracks can form and let water through to your floor.
On average, toilets have a lifespan of 20–50 years, so if your toilet dates back to the Hoover administration, it’s time for a new, water-efficient unit.
Check the wax ring
The wax ring provides a watertight seal where the toilet connects to the flange of a sewer pipe.
Loose tee bolts can damage the wax ring’s seal. Also:
- The wax may be old and brittle
- The ring may be out of position
- The ring may be poorly installed
The only way to check the wax ring is to:
- Shut off the water supply
- Unbolt the toilet from the flange and lift it off the sewer pipe
- Remove the old wax ring
- Clean and inspect the flange (for damage or corrosion)
A leaky wax seal must be replaced.
Here, we may have moved beyond a DIY repair. Your best option is to call an experienced plumber who’ll do the job right. But whatever you do, you should take immediate action.
Below, so that you know, we’ll go through the steps of replacing a wax ring.
How to Replace a Damaged Toilet Wax Ring
A toilet wax ring is simple and inexpensive. But it’s not simple to replace.
You’ll must detach the toilet from the base, which isn’t a quick or pleasant DIY project. And you may need an extra hand to remove the toilet or risk breaking it. That makes the DIY project an unpleasant task for two.
Prepare the following tools
- Adjustable wrench
- Old towels and rags
- Putty knife
- Plastic shim (optional)
- Caulk and caulking gun
- Replacement wax ring
- New tee bolts
Replace the wax ring
- Drain the toilet and shut down its water supply.
- Carefully unfasten the toilet and lay it on its side.
- Remove the old wax ring or scrape it from the toilet base.
- Run warm water over the new wax ring to soften it.
- Install the new wax ring on the toilet’s base. If the flange is below the floor line, you should install an additional filler wax ring (or a similar product that does the same job).
- Attach your new tee bolts to the sewer flange.
- Reinstall your toilet on the sewer pipe (and wax ring), using your tee bolts as a guide.
- Tighten the tee bolts and replace their plastic caps.
- Inspect the toilet base for leaks after you turn the water on.
- Wait a few days before you caulk the base to ensure the installation is watertight.
FAQs: Fixing a Toilet Leak at the Base
Q: What causes a toilet to leak at the base?
Leaks at the toilet’s base can be caused by a failing wax ring, loose or damaged flange bolts, or a crack in the toilet base itself.
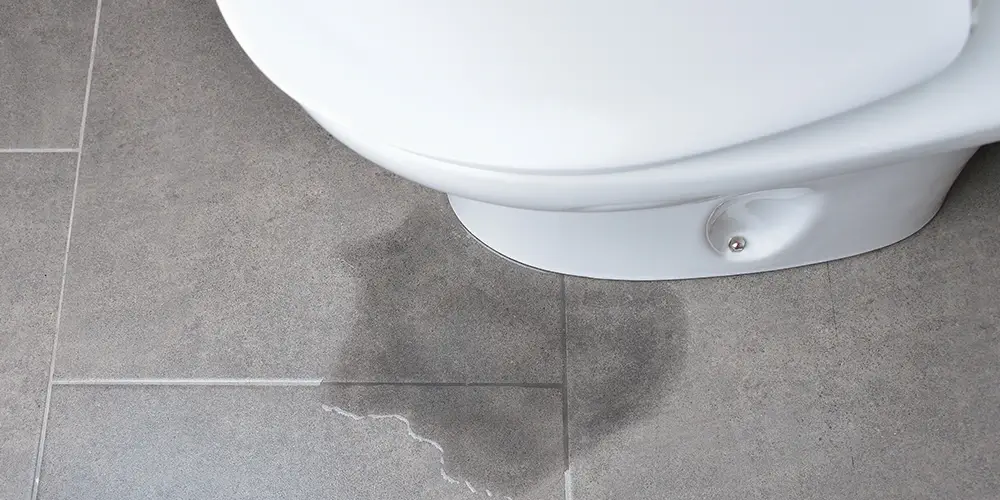
Q: How can I tell if the leak is coming from the base?
If you notice water pooling around the base of your toilet after flushing or during regular use, it’s a strong indication that the leak is coming from the base.
Q: Is it difficult to fix a toilet leak at the base?
Repair can range from a straightforward DIY project, such as tightening bolts or replacing a wax ring, to more complex repairs, like replacing the flange, which might require a plumber.
Q: What tools will I need to fix a leak at the toilet base?
Basic tools include a wrench or pliers for tightening bolts, a putty knife for removing and replacing the wax ring, and a screwdriver for removing the toilet if necessary.
Q: How often should the wax ring be replaced to prevent leaks?
There’s no set timeline for replacing the wax ring, but it’s a good idea to check it whenever you’re performing maintenance on the toilet or if you notice signs of a leak.
Q: Can a leaking toilet base damage my bathroom?
Yes, it can damage your flooring and subflooring, potentially leading to mold and mildew problems if not addressed promptly.
Q: What should I do if the bolts are rusted or the toilet base is cracked?
You should replace corroded bolts. If the base is cracked, you’ll probably have to replace the toilet.
Q: Are there alternative seals available besides the traditional wax ring?
Wax-free toilet seals can be easier to install and provide a more durable solution against leaks.
Q: How do I ensure the toilet is sealed adequately after repairs?
Verify that all bolts are correctly tightened, and the toilet sits evenly on the floor. Conduct a test flush and check for leakage.
