If your sink drain shows signs of wear and rust, it’s time for a replacement. The good news? With patience and the right tools, you can tackle this job yourself. So prepare to roll up your sleeves and give your sink a new lease on life!
Tools & Materials You’ll Need
Tools
- Adjustable wrench or channel-lock pliers
- Plumber’s putty
- Bucket or container (to catch water)
- Screwdriver (flathead and Phillips)
- Utility knife
Materials
- New sink drain assembly
- Plumber’s tape (Teflon tape)
- Rag or sponge (for cleanup)
How to Tell if Your Sink Drain Needs Replacing
We know you’re eager to start, but first, confirm with absolute certainty that your sink drain needs replacing. Look for these signs of corrosion or damage:
- Visible rust or greenish corrosion around the drain.
- Water seeping or dripping from the drain or pipes beneath.
- Frequent clogs or slow draining that may indicate internal damage.
A corroded drain can’t do its job correctly, so replacement is the best solution.
1. Prepare Your Workspace
- Shut off the water supply to the sink to avoid any unwanted spills.
- Remove any items stored in the cabinet.
- Place a bucket under the drain to catch any water that spills when loosening the plumbing.
2. Remove the Sink Drain Assembly
a. Loosen the P-Trap
- Locate the P-trap (the curved pipe beneath the sink).
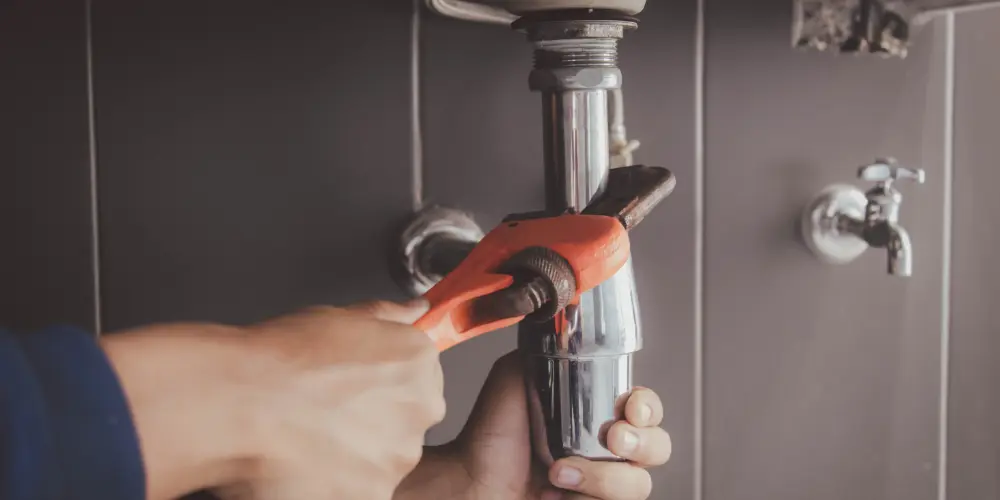
- Use an adjustable wrench or channel-lock pliers to loosen the slip nuts securing the pipe.
- Detach the P-trap and set it aside to clean or replace later.
b. Unscrew the Lock Nut
- From underneath the sink, locate the large lock nut securing the drain assembly.
- Use your pliers or wrench to unscrew the nut. Be ready for water to drip into the bucket.
c. Push Out the Old Drain
- Remove the plumber’s putty or sealant around the old drain from above the sink. Use a utility knife if necessary.
- Push the drain assembly up and out of the sink. If it’s stuck due to corrosion, you may need to gently tap it with a screwdriver and mallet.
3. Clean the Sink Area
Before installing the new drain assembly, clean the area thoroughly.
- Scrape off any old putty, grime, or debris around the drain hole.
- Wipe the surface with a damp rag or sponge to ensure a smooth, snug fit for the new drain.
4. Install the New Sink Drain
a. Apply Plumber’s Putty
- Roll a small amount of plumber’s putty into a rope-like shape.
- Place the putty around the underside of the new drain flange (the visible part of the drain on the inside of the sink).
b. Insert the New Drain
- Insert the drain assembly into the sink’s drain hole, pressing the flange firmly into the plumber’s putty to create a watertight seal.
c. Secure the Drain Assembly
- From underneath the sink, slide the rubber washer, friction ring, and lock nut up the threaded drain tailpiece. Tighten the lock nut with your adjustable wrench or pliers.
- Wrap plumber’s tape around the drain threads to further prevent leaks.
5. Reconnect the P-Trap
With the new drain in place, reattach the plumbing system.
- Line up the P-trap with the new drain tailpiece and secure it with slip nuts.
- Ensure all connections are tight, but avoid over-tightening, which can damage the pipes.
6. Test for Leaks
- Turn on the water slowly and inspect under the sink for leaks around the drain and P-trap.
- If you see any water escaping, tighten the connections further or reapply plumber’s tape where necessary.
Final Tips
- Choose the right drain assembly. The replacement drain should match your sink’s design and dimensions.
- Make the process easier by organizing your tools and materials before starting.
- Avoid future corrosion by cleaning your sink drain periodically and checking for signs of wear.
FAQs: Replacing a Corroded Sink Drain
Q: How do I know if my sink drain needs replacement?
Common signs include leaks, visible corrosion, or pooling water around the drain area despite cleaning efforts.
Q: Can I replace a sink drain myself without professional help?
Replacing a sink drain is typically a straightforward DIY task if you have basic tools and follow step-by-step instructions.
Q: What tools will I need for replacing a sink drain?
Essential tools include a wrench, plumber’s putty, a screwdriver, and possibly a drain removal tool.
Q: How long does it take to replace a sink drain?
Replacing a sink drain takes around 30 minutes to an hour, depending on your skill level and the complexity of the setup.
Q: Should I shut off the water supply before replacing a sink drain?
It’s not necessary to shut off the water supply since the drain is below the faucet. However, avoid running water during the process.
Q: Can I reuse the old drain parts?
It’s best to replace old or corroded parts to ensure a tight seal and prevent future leaks.
Q: What if the new drain doesn’t fit properly?
Double-check the size and design specifications of the replacement drain. Sometimes, you may need to purchase another one or use adapters.
Q: How can I prevent sink drain issues in the future?
Clean the drain regularly to reduce buildup, avoid putting grease or large debris down it, and inspect it periodically for wear or damage.
